webサイトに設置するチャットボットの画面サイズを変更したい場合は、こちらの設定を行ってください。
本記事では、縦:画面いっぱい、横:画面の半分のサイズを想定して、設定の一例(ノートPCで見たサイズ)を記載します。
※チャットボットを利用するデバイスの環境(倍率や表示領域のサイズ)により多少の差異が生じる場合がございます。あらかじめご了承ください。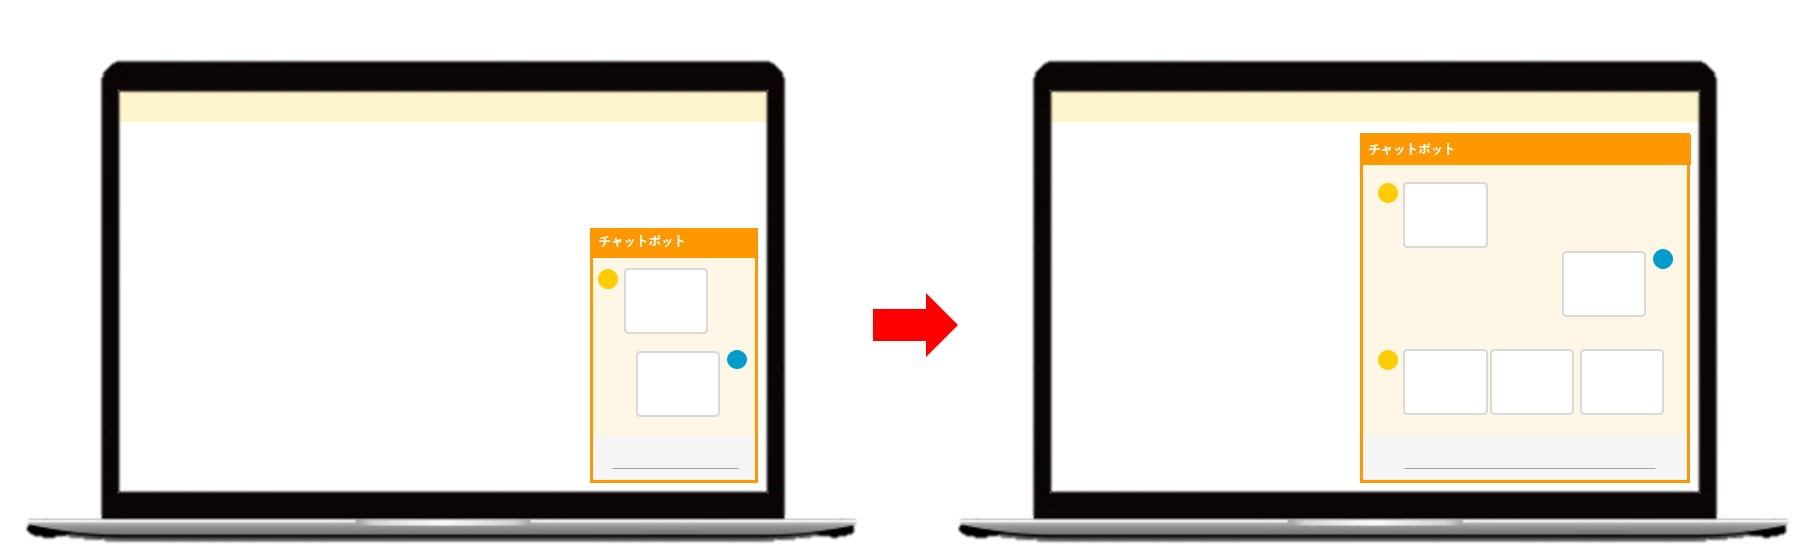
サイズ変更の流れ
- 管理画面にて該当のチャットボットを選択する。
- 「設定」>「基本設定」にて、チャットの設置位置を指定し、設置用HTMLのコードをコピーする。
- メモ帳アプリを開いて、コードを貼り付ける。(テキストが変更できれば他のアプリでも可能)
- マニュアル通りにコードを変更する。
- 変更したコードを設置したいサイトに貼り付ける。
※プレビューで確認したい場合は、拡張子を「.html」に設定して保存し、保存したファイルをブラウザで開くと確認できます。
縦に大きくする
※leftとrightは読み替えてください
.left_chat_window
【変更前】
.left_chat_window {
position: fixed;
bottom: 40px;
left:5px;
overflow-y: hidden;
border: 3px solid #EF7A2EFF;
border-radius: 9px;
height:calc(100vh - 180px);
}
①height:calc(100vh - 180px); → height:90vh;
に変更します。
max-height:1000px;
を追加します。
【変更後】
.left_chat_window {
position: fixed;
bottom: 40px;
left:5px;
overflow-y: hidden;
border: 3px solid #EF7A2EFF;
border-radius: 9px;
height:90vh;
min-height:340px;
max-height:1000px;
}
.left_chat_picuture
【変更前】
.left_chat_picuture {
position: fixed;
bottom: 40px;
left: 8px;
height:calc(100vh - 180px);
cursor: pointer;
display: none;
min-height: 340px;
z-index: 1000;
width: 90vw;
max-width: 400px;
}
height:calc(100vh - 180px); → height:90vh;
に変更します。
【変更後】
を追加します。
.left_chat_picuture {
position: fixed;
bottom: 40px;
left: 8px;
height:90vh;
cursor: pointer;
display: none;
min-height: 340px;
z-index: 1000;
width: 90vw;
max-width: 400px;
max-height:1000px;
}
横に大きくする
※leftとrightは読み替えてください
.left_chat_picuture
※こちらはleftのみの作業で、rightは変更する必要はありません。
【変更前】
.left_chat_picuture {
position: fixed;
bottom: 40px;
left: 8px;
height:calc(100vh - 180px);
cursor: pointer;
display: none;
min-height: 340px;
z-index: 1000;
width: 90vw;
max-width: 400px;
}
max-width:400px; → max-width:800px;
に変更します。
【変更後】
.left_chat_picuture {
position: fixed;
bottom: 40px;
left: 8px;
height:calc(100vh - 180px);
cursor: pointer;
display: none;
min-height: 340px;
z-index: 1000;
width: 90vw;
max-width: 800px;
}
<div id="picture" class="left_chat_picuture">
【変更前】
<div id="picture" class="left_chat_picuture">
<iframe class="left_chat_window" id="chat" scrolling="no" border="0"
src="" style="width: 90vw; max-width: 400px;" frameborder="yes" onUnLoad="CloseMe()">
</iframe>
<div class="left_close_icon" onClick="closeMe()">
<img src="チャットボットのURL" alt="minimize" width="35" />
</div>
</div>
max-width:400px; → max-width:800px;
に変更します。
【変更後】
<div id="picture" class="left_chat_picuture">
<iframe class="left_chat_window" id="chat" scrolling="no" border="0"
src="" style="width: 90vw; max-width: 800px;" frameborder="yes" onUnLoad="CloseMe()">
</iframe>
<div class="left_close_icon" onClick="closeMe()">
<img src="チャットボットのURL" alt="minimize" width="35" />
</div>
</div>
function removeFrame()
【変更前】
function removeFrame() {
let eleiframeid = document.getElementById("chat");
// del
let parentframe = eleiframeid.parentElement;
parentframe.removeChild(eleiframeid);
// create
eleiframeid = document.createElement('iframe');
eleiframeid.id = "chat";
eleiframeid.classList.add("left_chat_window");
eleiframeid.style.width = "90vw";
eleiframeid.style.maxWidth = "400px";
eleiframeid.setAttribute("src", "");
eleiframeid.setAttribute("data-src", "チャットのURL");
parentframe.appendChild(eleiframeid);
}
eleiframeid.style.maxWidth = "400px"; → eleiframeid.style.maxWidth = "800px";
に変更します。
【変更後】
function removeFrame() {
let eleiframeid = document.getElementById("chat");
// del
let parentframe = eleiframeid.parentElement;
parentframe.removeChild(eleiframeid);
// create
eleiframeid = document.createElement('iframe');
eleiframeid.id = "chat";
eleiframeid.classList.add("left_chat_window");
eleiframeid.style.width = "90vw";
eleiframeid.style.maxWidth = "800px";
eleiframeid.setAttribute("src", "");
eleiframeid.setAttribute("data-src", "チャットURL");
parentframe.appendChild(eleiframeid);
解決できましたか?